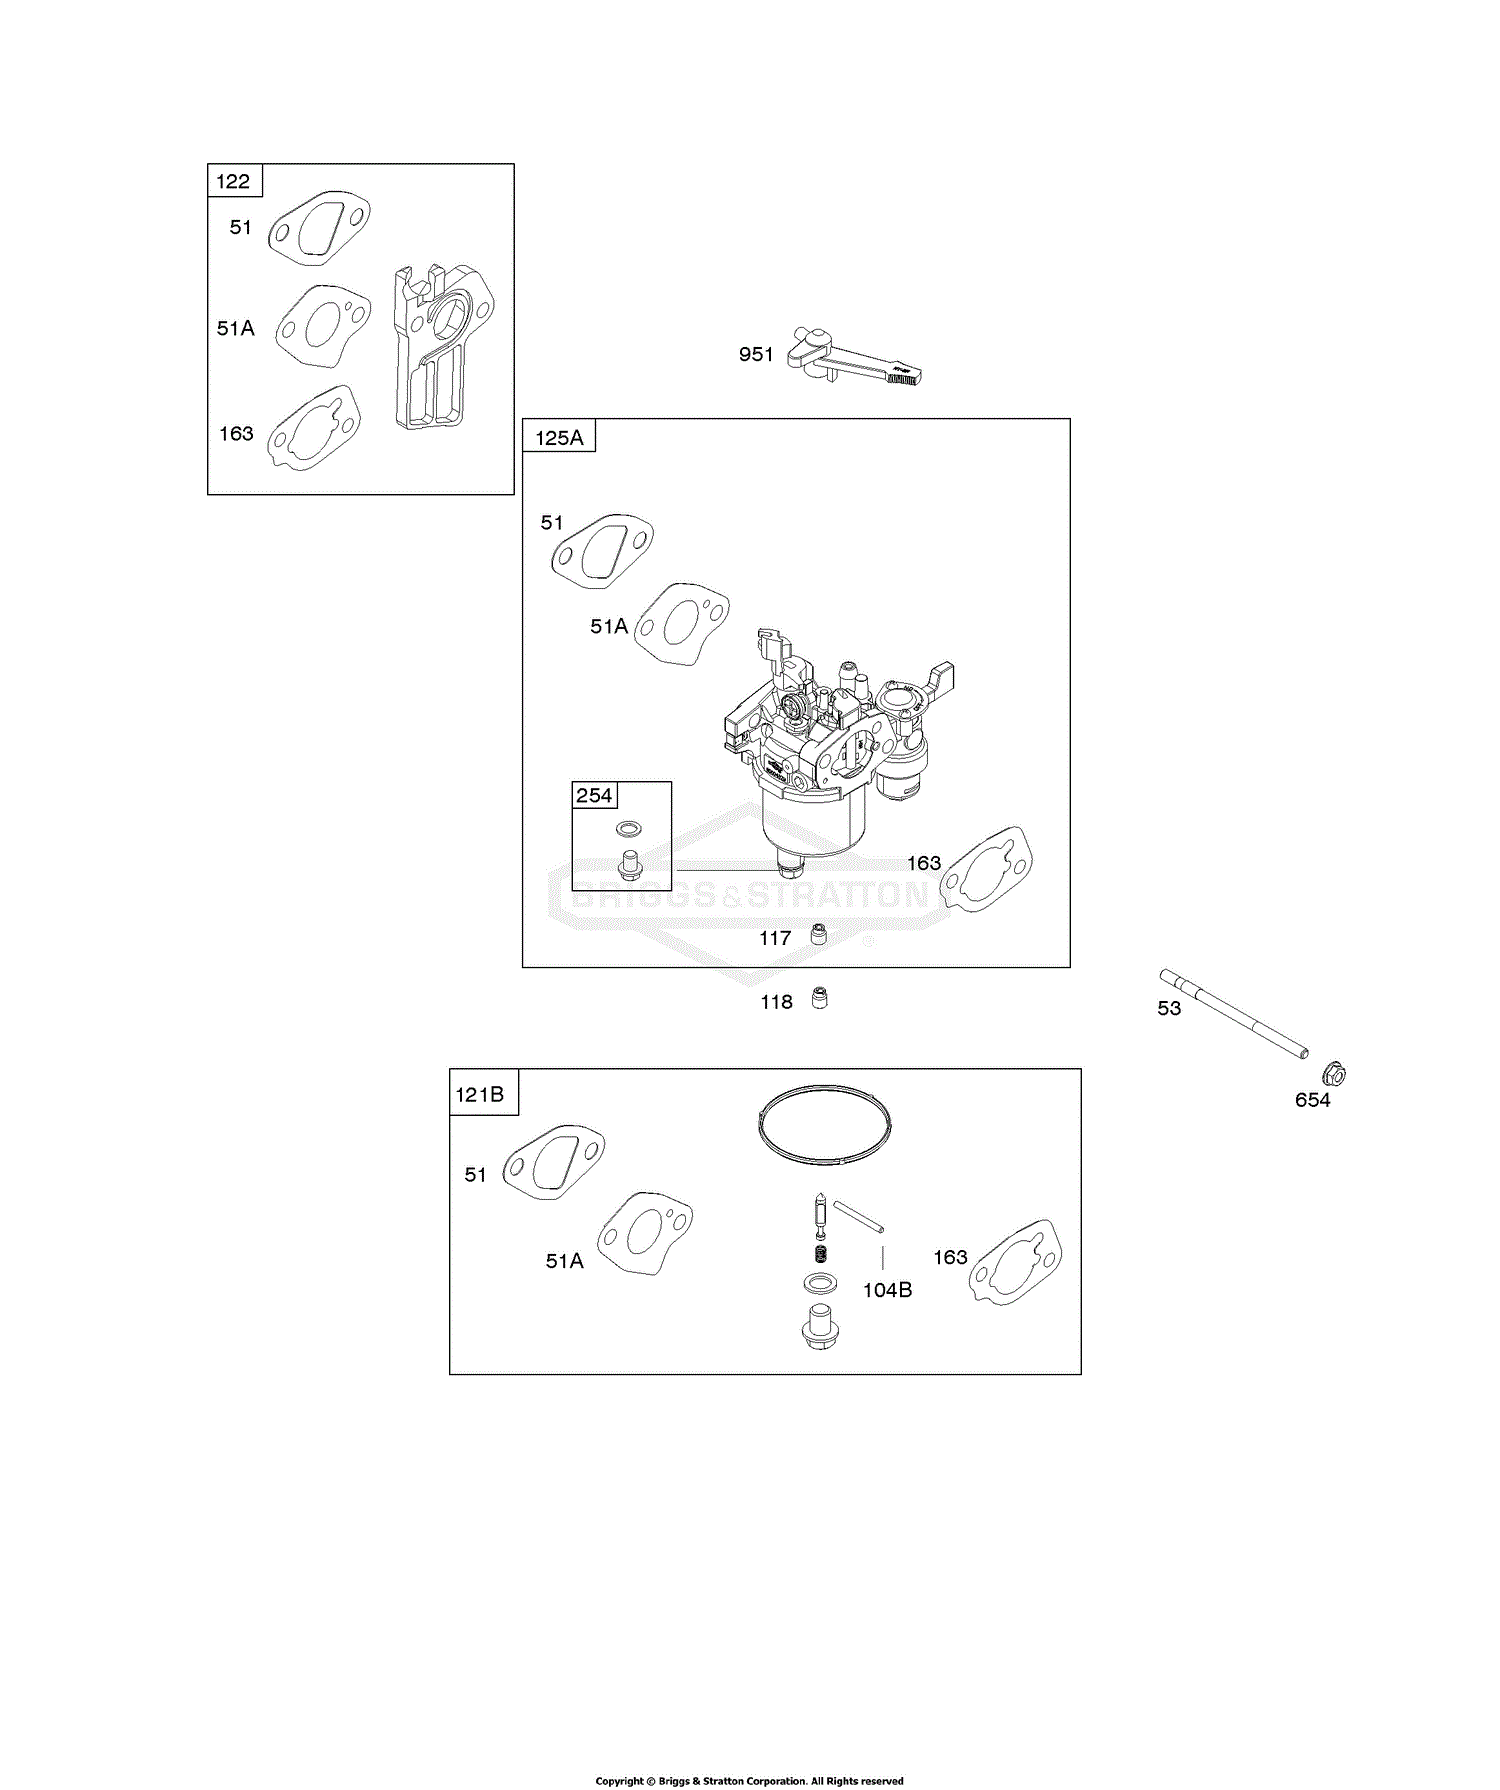
To find a Briggs And Stratton Carburetor Diagram, you can search online at Jacks Small Engines or on the Briggs & Stratton Power Products website for a visual guide. This will help you understand the linkage, throttle, governor spring, and other parts for your specific model.
Additionally, instructional videos on websites like YouTube can provide step-by-step guidance for tasks such as cleaning, rebuilding, or repairing the carburetor. You may also benefit from learning how to identify your specific Briggs and Stratton carburetor number to ensure you find the most accurate diagram or parts for your engine.
Understanding your carburetor and its components is essential for maintaining the optimal performance of your Briggs and Stratton engine.
Credit: www.briggsandstratton.com
Understanding Briggs And Stratton Carburetor Diagram
The Briggs and Stratton carburetor diagram is a visual representation of the components and their positions in the carburetor, essential for understanding how the carburetor works and how to perform maintenance or repairs. It is an invaluable resource for DIY enthusiasts and professionals alike. This section will provide essential information about the Briggs and Stratton carburetor diagram, from its significance to its basic components.
What Is A Carburetor?
A carburetor is a device in an internal combustion engine that blends air and fuel for an internal combustion engine. It plays a crucial role in the engine’s performance and efficiency by ensuring the proper mixture of air and fuel is delivered to the engine for combustion.
Why Is The Carburetor Important In Briggs And Stratton Engines?
The carburetor is vital in Briggs and Stratton engines as it directly affects the engine’s performance, fuel efficiency, and overall functionality. It is responsible for delivering the correct air-fuel mixture, ensuring optimal combustion and smooth engine operation.
Common Carburetor Problems
Briggs and Stratton carburetors are essential components of small engines, and like any other part, they can develop issues over time. A malfunctioning carburetor can lead to poor engine performance and other operational problems. Let’s look at some common carburetor problems that you might encounter.
Leaking Gas
If fuel is leaking from the bottom of the carburetor, the float bowl gasket might be dried out or missing. Check the connections to the fuel filter and to the filter housing. If any of the fuel lines are dry or cracked, replace them.
Clogged Jets
One common issue with carburetors is clogged jets. When jets become clogged with debris or varnish, the fuel flow to the engine is restricted, leading to performance issues. Regular cleaning and maintenance are crucial to prevent this problem.
Stuck Float
A stuck float in the carburetor can result in an abnormal fuel level, causing the engine to run rich or lean. This often occurs due to dirt or debris causing the float to get stuck in the closed or open position. Cleaning the carburetor and ensuring proper float movement can resolve this issue.
Faulty Choke
A faulty choke can lead to starting problems and rough idling of the engine. The choke controls the air-fuel mixture during cold starts. If it malfunctions, the engine may struggle to start or run poorly. Regular inspection and adjustment of the choke mechanism are necessary to avoid this problem.
How To Clean And Maintain A Briggs And Stratton Carburetor
Proper maintenance of your Briggs and Stratton carburetor is essential for ensuring the smooth operation of your engine. Over time, dirt, debris, and varnish can clog the carburetor, leading to poor performance and fuel inefficiency. In this guide, we will walk you through the step-by-step process of cleaning and maintaining a Briggs and Stratton carburetor to keep your engine running smoothly.
Removing The Carburetor
To start the cleaning process, you’ll need to remove the carburetor from your Briggs and Stratton engine. Follow these steps:
- First, remove the spark plug wire to prevent accidental engine starting.
- Next, remove the air filter cover and air filter to access the carburetor.
- Disconnect any fuel lines or cables attached to the carburetor.
- Using a wrench or socket, remove the bolts securing the carburetor to the engine.
- Gently pull the carburetor away from the engine and set it aside in a clean, well-ventilated area.
Taking Apart The Carburetor
Once the carburetor is removed, you can disassemble it to clean each component individually. Follow these steps:
- Start by removing the fuel bowl located at the bottom of the carburetor.
- Using a screwdriver, carefully unscrew the main jet and any other removable jets or needles.
- Inspect each component for dirt, debris, or signs of damage.
- If necessary, use a small brush or toothbrush to gently scrub away any built-up residue.
- Make sure to pay attention to small passages and airways that may be clogged.
Cleaning The Components
Once the carburetor components have been disassembled, you can clean them thoroughly. Follow these steps:
- Fill a small container with carburetor cleaner or a mixture of water and mild detergent.
- Place the components into the cleaning solution and allow them to soak for 10-15 minutes.
- Using a soft-bristle brush, scrub each component to remove any remaining dirt or debris.
- Rinse the components under running water to remove any cleaning solution residue.
- Inspect each component again to ensure they are clean and free of any obstructions.
Reassembling The Carburetor
Once the components are clean, you can reassemble the carburetor. Follow these steps:
- Begin by reinstalling the main jet and any other removable jets or needles.
- Secure the fuel bowl back onto the carburetor.
- Ensure that all connections and gaskets are properly aligned.
- Tighten any screws or bolts that hold the carburetor assembly together.
- Double-check that all components are securely attached and in the correct positions.
Adjusting The Carburetor
After reassembling the carburetor, it’s important to properly adjust it for optimal performance. Follow these steps:
- Refer to your Briggs and Stratton engine manual for the specific carburetor adjustment procedures.
- Typically, adjustments involve setting the idle speed and adjusting the fuel/air mixture.
- Make small adjustments at a time, testing the engine’s performance after each adjustment.
- Continue adjusting until you achieve smooth idling and consistent power output.
By following these steps, you can successfully clean and maintain your Briggs and Stratton carburetor, ensuring that your engine performs at its best.

Credit: www.amazon.com
Replacing Carburetor Parts
When dealing with Briggs and Stratton carburetor diagrams, it’s essential to know how to replace carburetor parts efficiently. Below, we guide you through the steps of identifying the carburetor number, finding the right parts, and replacing crucial components like gaskets, seals, floats, jets, and needles.
Identifying The Carburetor Number
Before replacing any carburetor parts, determine the specific carburetor number for your Briggs and Stratton engine. This number can usually be found engraved or stamped on the carburetor body itself.
Finding The Right Parts
Once you have the carburetor number, ensure you source the correct replacement parts. Refer to the Briggs and Stratton carburetor diagram matching your carburetor number to identify the exact components needed for replacement.
Replacing Gaskets And Seals
When replacing gaskets and seals, carefully remove the old ones and install the new ones in their place. Ensure a proper seal to prevent any fuel leaks or air intake issues that can affect engine performance.
Replacing The Float
Replacing the float requires precision to ensure the correct functioning of the carburetor. Remove the old float and install the new one according to the manufacturer’s instructions, adjusting the float level if necessary.
Replacing Jets And Needles
For jets and needles replacement, disassemble the carburetor carefully and swap out the old components with the new ones. Pay close attention to the alignment and settings to optimize fuel and air mixture for engine operation.
Tips And Tricks For Carburetor Maintenance
Learn how to maintain your Briggs and Stratton carburetor with these helpful tips and tricks. With a detailed diagram and step-by-step instructions, you’ll be able to effectively clean and repair your carburetor without any hassle. Keep your engine running smoothly and prolong its lifespan with proper carburetor maintenance.
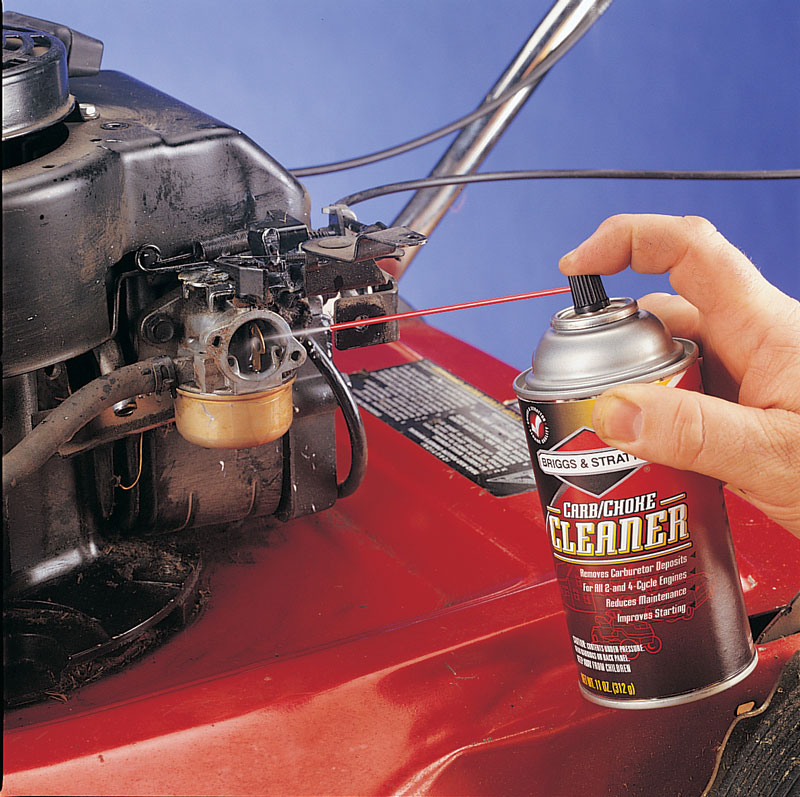
Using carburetor cleaner spray: Keep your carburetor in top condition by using a carburetor cleaner spray for both inside and outside cleaning.
Inspecting fuel lines: Regularly check the fuel lines for any cracks or leaks that could affect the carburetor’s performance.
Checking for air leaks: Ensure there are no air leaks in the carburetor system, as they can lead to improper fuel combustion.
Adjusting carburetor settings: Fine-tune the carburetor settings to optimize fuel-air mixture for efficient engine operation.
Regularly cleaning the air filter: Clean the air filter regularly to prevent dirt and debris from entering the carburetor.
Carburetor maintenance is crucial for the smooth operation of your Briggs and Stratton engine. By following these tips and tricks, you can ensure optimal performance and longevity of your equipment.
Credit: www.jackssmallengines.com
Frequently Asked Questions For Briggs And Stratton Carburetor Diagram
Can You Clean A Briggs And Stratton Carburetor Without Removing It?
Yes, you can clean a Briggs and Stratton carburetor without removing it using spray carburetor cleaner.
How Do I Find My Briggs And Stratton Carburetor Number?
To find your Briggs and Stratton carburetor number, look for it stamped directly on the carburetor.
Why Is My Briggs And Stratton Carburetor Leaking Gas?
If your Briggs and Stratton carburetor is leaking gas from the bottom, it may be due to a dried out or missing float bowl gasket. Check the fuel filter connections and replace any dry or cracked fuel lines. Avoid cutting and reattaching fuel lines.
Conclusion
To effectively troubleshoot and repair your Briggs and Stratton carburetor, it’s important to have a clear understanding of its diagram. By following the steps outlined in this blog post, you can confidently dismantle and clean your carburetor, ensuring optimal performance of your engine.
Remember, you can clean your carburetor without removing it by using a carburetor cleaner spray. Additionally, if you’re unsure of your carburetor number or experiencing issues like fuel leaks, refer to our helpful tips and videos for easy solutions. Gain an in-depth understanding of your carburetor with our comprehensive carburetor parts diagram.
Happy repairing!